


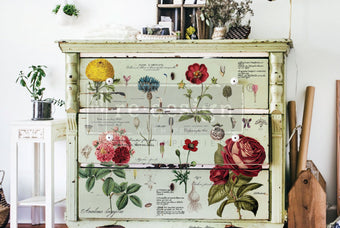
WoodUbend mouldings are perfect for quickly and easily enhancing your upcycled furniture and craft projects. All you need is a heat source, some good quality wood glue and a surface to stick your WoodUbend to!
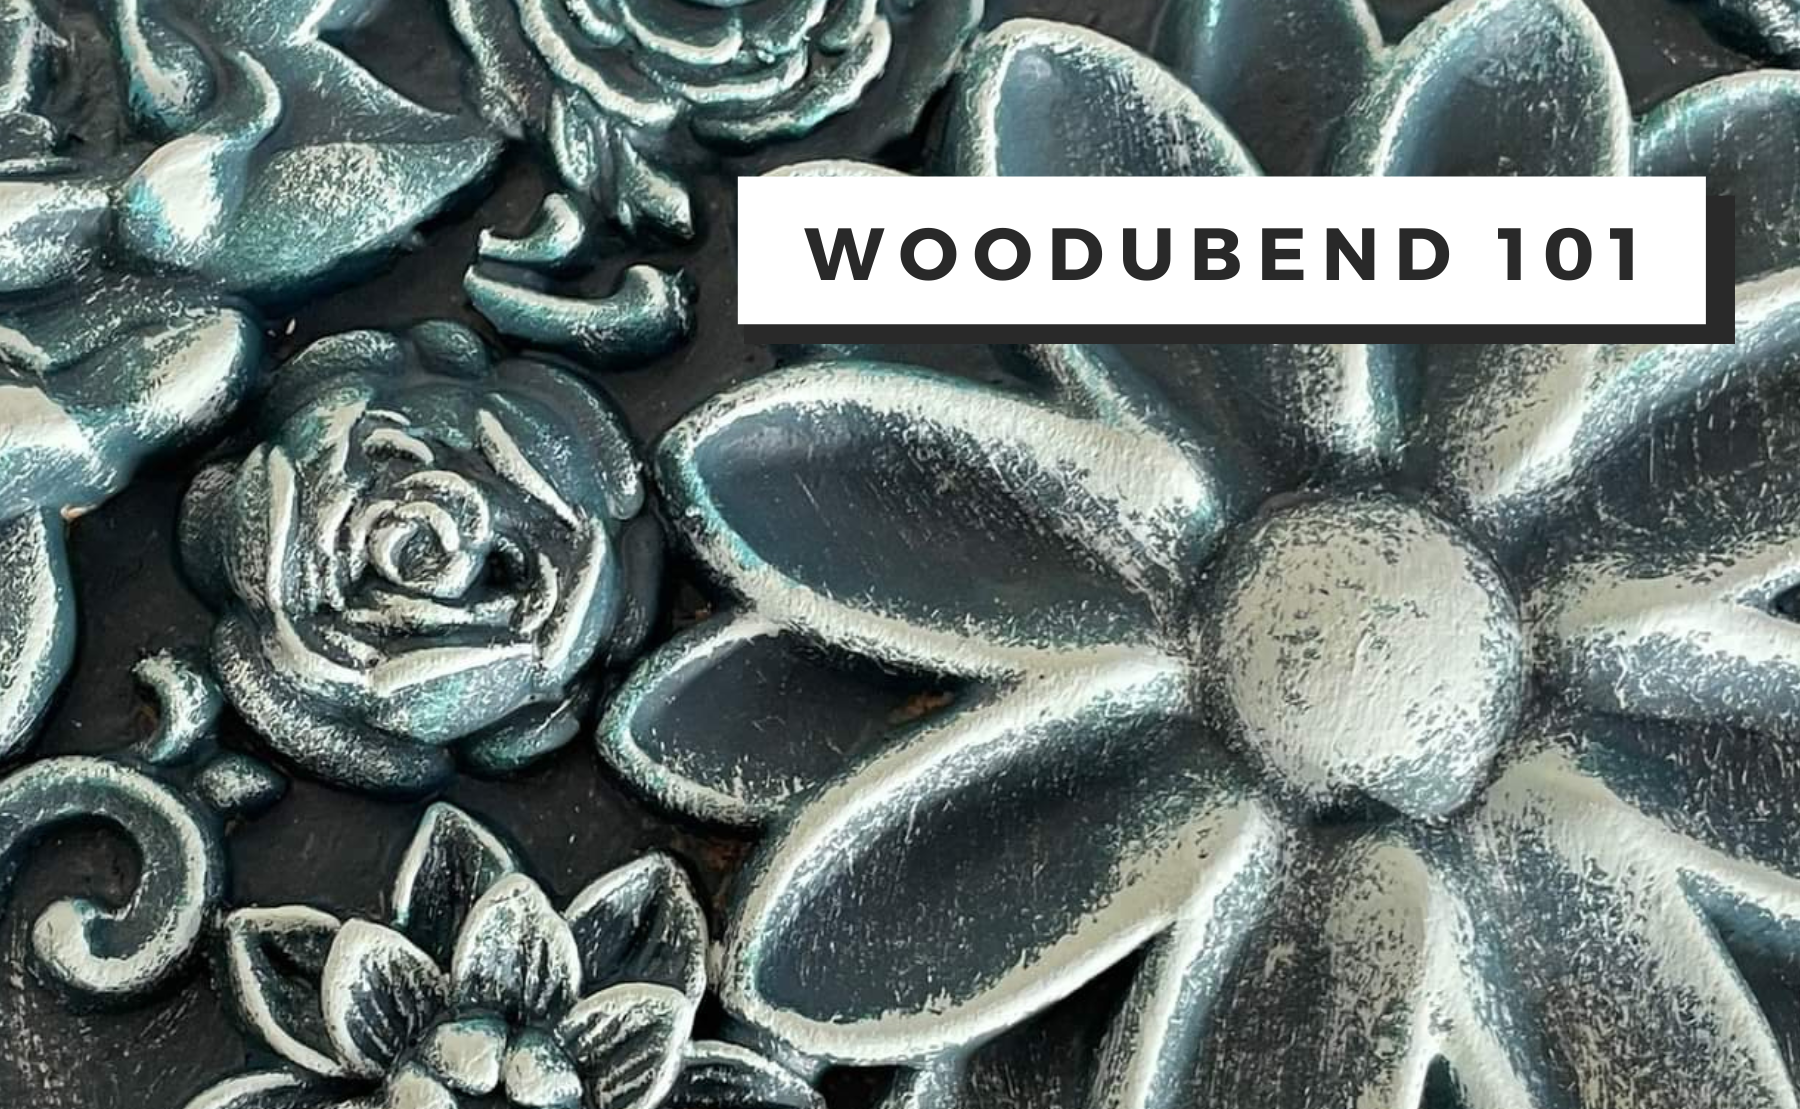
WoodUbend Mouldings are revolutionary decorative mouldings that have all the properties of wood when cool. They can be painted, sanded, drilled, and stained. When warmed they can be shaped to fit any surface.

What is WoodUbend made of?
WoodUbend is made from... wood! WoodUbend mouldings are created from wood fibers and pressed in a mould, creating the intricate patterns they offer. Due to this unique production process the mouldings have all the properties of wood.
How to Apply WoodUbend Mouldings
- Heat the moulding with a heat gun , hair dryer or on a griddle.
- Apply glue to the surface or the entire back of the moulding.
- Press onto surface firmly.
- Heat once more.
- Remove excess glue with a Q-tip, baby wipe or wet paint brush.
- Enjoy!
Removing a WoodUbend Moulding
- Once properly adhered the WoodUbend mouldings will stay in firmly in place for decades. We understand that accidents happen though, so we’ve made it easy for the wood mouldings to be removed and replaced:
- Heat the moulding with a heat gun , hair dryer or on a griddle.
- Slide something thin like a spatula or knife under the moulding
- Pull the now flexible wood moulding off of the surface.
- Now the WoodUbend moulding is ready to be reapplied elsewhere.
You may pull some paint off of the surface so make sure you have some touch up paint handy!
How to use WoodUbend Trims
WoodUbend trims are 3.1 meters long and can be used to uplift all of your creative projects. The flexible wood trims are equally effective when used in place as a dado rail or to embellish a crown moulding or coving. Some top tips to remember:
- Don’t unroll the trims before heating them first.
- Keep them coiled up & unroll only what you need.
- If you cut them short, don’t worry, they will stretch by up to 10%.
- You can cool them and reheat them as much as you like.
Can I Stretch Woodubend Trims?
If you cut your WoodUbend decorative trim a little short, don’t worry! There’s an easy solution which will have you back on track in no time:
- Reheat before gluing or whilst the glue is still wet
- Apply glue to both ends of the trim
- Stretch the trim and push both ends together
- Hold until cool
- WoodUbend decorative mouldings can stretch up to 10%
How to Fix a Broken Moulding
Accidents happen! Luckily, WoodUbend decorative mouldings are really easy to fix. All you need is a heat gun and some wood glue:
- Heat both bits of the moulding
- Apply wood glue to both broken ends
- Smoosh (press) both bits together to get them into alignment
- I typically throw the heat on one more time, and smoosh again to make sure it is good to go.
- Hold together until cool or the two parts of the decorative moulding are no longer coming apart.
- Remove any excess glue from around the repair. Voila!